
Budget Friendly Teenage Boy Bedroom Makeover-DIY
Have you ever tried to redecorate a room on a tight budget? I know I have. The most frustrating part is researching for ideas and finding that you “need” a couple thousand dollars to do one room. One!
But I am nothing if not frugal and always on the hunt for great deals. I always go for fun and inexpensive DIY projects and ways to stretch my small budget to the limit. That’s why when I set out for this project, I was determined to make this work. Not only for the sake of saving our hard earned dollars. But to show others what you can accomplish with limited resources. As long as you are willing to keep it simple, think outside the box, and experiment a little.
My boy turning 18 was definitely a big day, both in his life and ours. We are very proud of him and of the fine young man he has grown up to be. Of course, being such an important birthday, we knew we wanted to make it extra special.
But how?
The answer was actually quite simple: A budget friendly bedroom makeover!
See, he is a senior in high school (At the time this post is been published, he has graduated). Because of this, we figured his days living at home were somewhat numbered. However, he has decided to attend the local community college for two years, before heading out to a 4-yr college to finish his education. This means, he gets to enjoy his room for 2 more years! Yay, right?
Well, not quite.
The problem was, his room looked absolutely awful. Up until the summer of 2015 he only spent summer vacations with us. He is actually my Godson, so he lived with his “other” Mom during the school year. Because of this, his room was basically slapped together, walls painted, and the most basic furniture. He didn’t need much more than that for a couple months here with us.

What changed?
The summer-only arrangement changed when he decided to stay with us for the remainder of his high school education. But because we thought he might just move out after senior year, we didn’t do much about it. When he told us he would be staying a tad longer, we were very happy. But that also made re-decorating his room an absolute must.
What to do then?
Of course, I turned to Pinterest® for some inspiration. I had a vague idea of what I wanted and the color palette that he would be happy with, but I needed some ideas STAT. Creating a secret board with all the amazing stuff I found thru Pinterest was my first step. I created the secret board on my personal Pinterest® account, but have made it available for all now that the project is done. Step by step instructions or projects weren’t absolutely necessary for me, though. I just needed some inspiration.
And inspiration I found.
My goal was to have his room ready for his birthday. This meant I had to work fast. My first step was to make lists of what I needed. Then I did some online research (I am always more than willing to avoid the stores haha) and made a plan. I was a Mom-on-a-Mission!
Budget Friendly Teenage Boy Bedroom Makeover-DIY
For your convenience, this post may contain affiliate links. That means that if you click on a link provided in the post and make a purchase, I might get a small commission, at no added cost to you. For my full disclosure policy, go here.
Paint and painting materials
First of all, I really had to do something about his ceiling. His room is in the basement, see. That means, the ceiling (among other things) was very uncomfortable to look at. Also, our home is a rental, so we have kind of inherited some most unfortunate structural AND decor decisions from the original builder and former tenants, respectively.
While we have an excellent relationship with our landlord, we always make sure we request approval prior to making changes. Painting the basement ceiling and floor are things that we are certain that our landlord has no problem with though, so we decided to give it a go.
(If you also live on a rental, make sure to ask permission prior to starting a project. It will not only spare you unnecessary headaches, but also make for a better landlord/tenant relationship.)

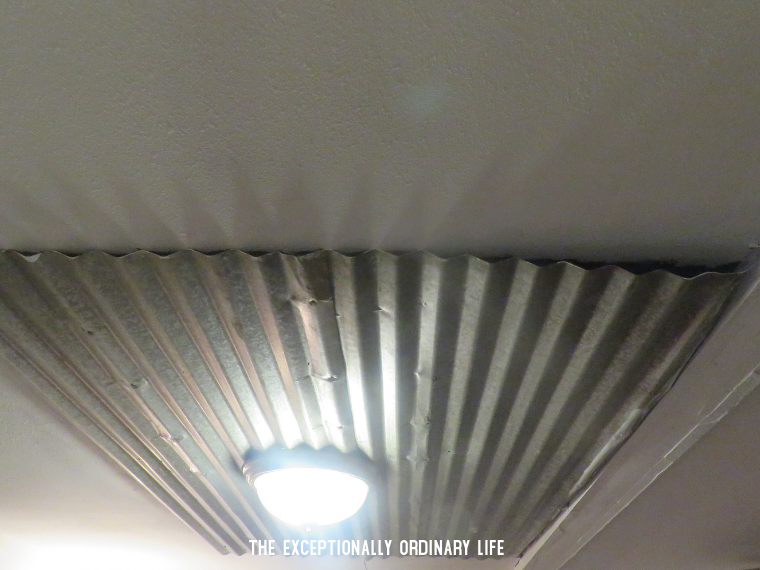
As you can see on the picture above (and below), my son’s bedroom ceiling was painted red. Red! If it had been done properly, I wouldn’t have had a problem with it (I am almost positive the red is the work of a previous tenant). But no. The paint job was terrible.
To top it off, there’s a metal plank smack right in the middle of the ceiling and the ceiling light fixture is attached to it. My boy had absolutely no issue with either the color OR the metal plank (kids!), so I decided to concentrate my efforts (and resources) on the paint issue.

To fix this, I purchased this fantastic paint roller, along with this handy tool for easy clean up. And because I am an Amazon Prime customer, I enjoy the 2-day free shipping. Pretty neat, huh?
The main reason why I chose the EZ-Twist Paint Roller Applicator is that painting a ceiling is probably one of the messiest projects around. There’s always the risk of paint dripping down on the floor, or on any big furniture that was not removed from the room. Or even worse, while you’re diligently looking up to make sure the job is getting done right, you get a splash of paint on your face! Do you see that small, gray tray in the picture? That fabulous tray prevents the dreaded dripping and splashing of paint.
This paint roller applicator worked wonderfully. Only my husband had a bit of a problem with it: he is taller than I am AND the ceiling is rather low so he felt it was kind of awkward to use. Otherwise, the EZ-Twist is awesome!

I went to the local hardware store to purchase the paint. As stated above, I did a ton of research for inspiration. But painting the ceiling was non-negotiable. It had to be done. For the ceiling, I used Glidden Professional Interior Ceiling Paint.
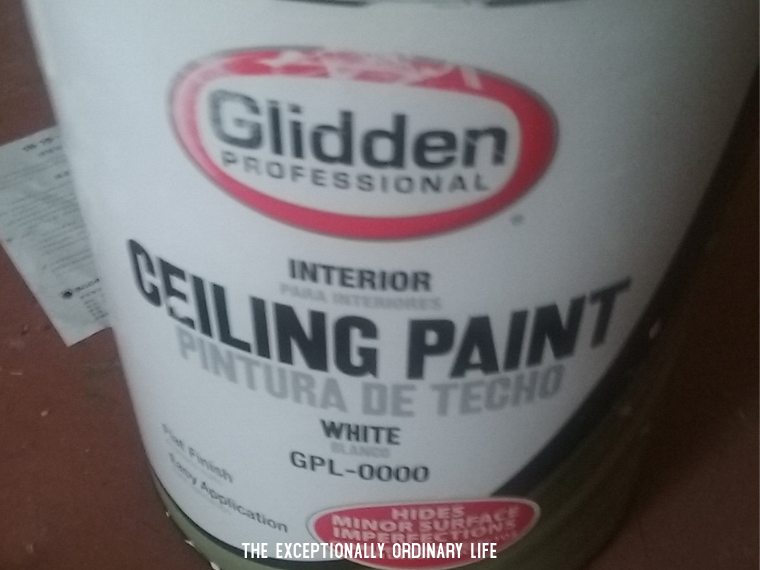
I have to admit that I was not overly confident that white paint was going to cover up such a dark color. And because I am very lazy, I decided to not use primer. I have to say that it really turned out great though. My best guess is that my painting skills are superb. Just kidding. My husband did quite a bit (most of it) of the painting 😉 The paint is of excellent quality AND reasonably priced too, which I consider a win-win.
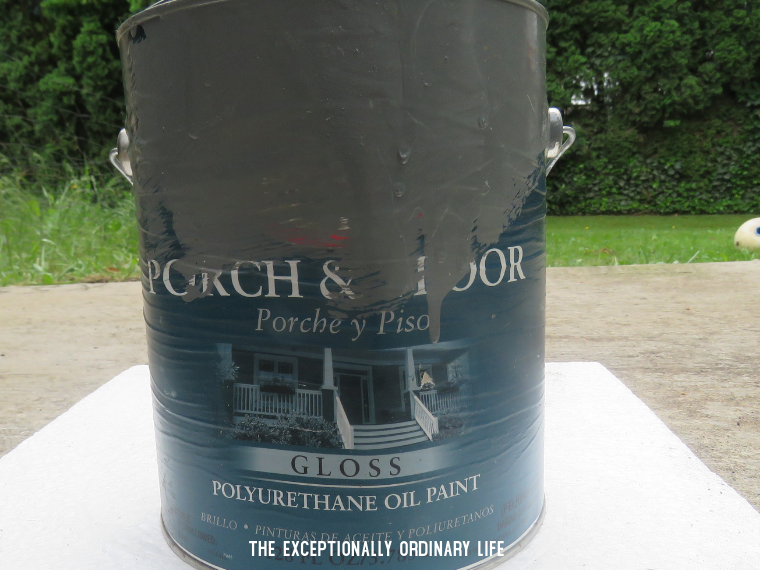
Choosing paint for the floor was a tad trickier. I needed something that would look nice. Sort of industrial-looking but not like a garage floor. Thankfully, I found exactly what I wanted thru Pinterest.
Julie at JulieBlanner.com used Glidden Porch & Floor Polyurethane Oil Gloss in Steel Gray paint for her laundry room floor and it turned out amazing! You should head over and take a look at the stunning transformation that she accomplished just by painting the floor. I decided to use the exact same color and I am very pleased with the end results.
With a fast approaching deadline, we decided to only get the smaller stuff out of the bedroom and pick up every single thing that we could find on the floor. That saved us quite a bit of time and energy. Then we cleaned the area thoroughly. Twice. My boy’s “roomie” is our black cat Sparky so you can probably imagine the amount of cat hair that has to be swept and vacuumed constantly.
Next, we moved the bed and other large pieces of furniture towards the door, leaving only enough room for whomever was painting to get out (yours truly had the honor). Once that was done, I started painting, starting at the back wall of the room. This is crucial if you don’t want to be stuck sitting on a bed watching paint dry for a day or two.
I wouldn’t recommend you watch this particular paint dry anyway though. The fumes are brutal! Even with all the doors and basement windows open, the smell was terrible. I suggest you plan on not going anywhere near the area while the paint dries.
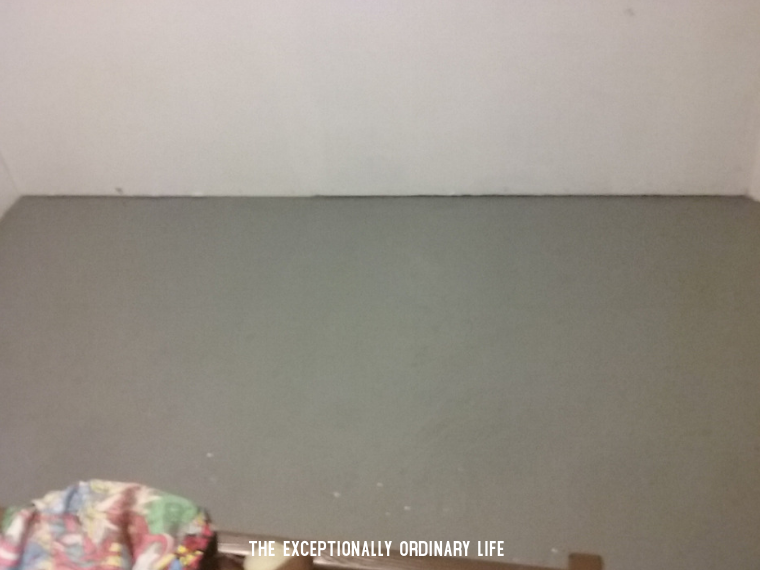
I love love love steel gray! Since our whole basement floor looks awful, I have decided to use the same paint throughout. But that’s another project for another day 😉
Shelves
Up until last week, his books were in this wire shelves unit. While I still love the wire organizer (I have one in my closet for shoes and the girls have them in their closets as well, for clothes and/or toys), it was a less than ideal solution for books. Books were way too heavy for it and since the wire shelves were on the floor, it needed to be moved frequently to clean up. Not cool.
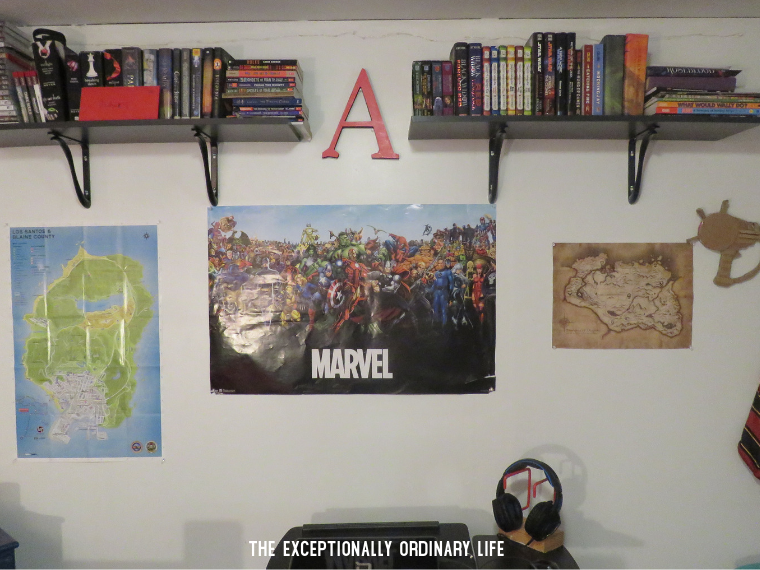
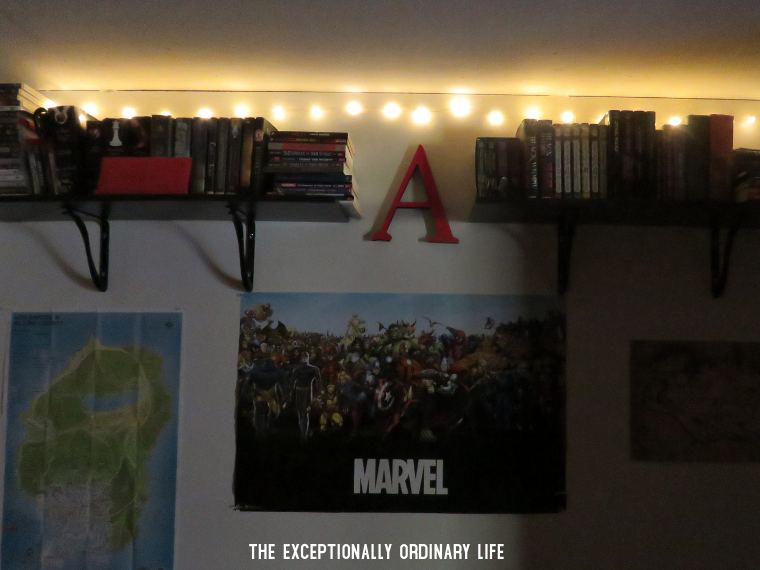
When my husband and I went to the local hardware store to pick up the paint, we also checked the storage area and found some awesome shelves. I was leaning towards floating shelves but we were afraid they wouldn’t hold up heavy weight. These black shelves were incredibly easy to install and my boy loved the color. Win win!
Check out how good the books look there!

Bedding
I searched everywhere for the right bedding for him. After visiting 1,000,000 stores in the area, Target came to the rescue. I had already made his decorative pillows (pictured below) AND closet curtain a while back. He loves the whole comic book theme, so I wanted to keep that and just integrate complimentary items.
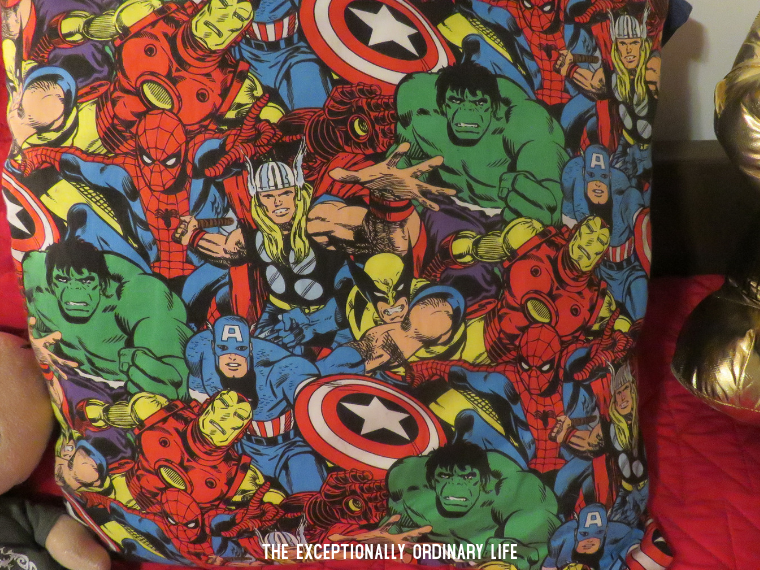
This red triangle stitch quilt and this bed sheet set were not only the perfect colors, but also soft and not bulky at all! I love these dark blue bed sheets because they feel nice and cool to the touch and the quilt because it makes for a neater bed when it’s made.

Also, by keeping the bedding simple and solid in color, we could potentially change the general theme of the room in the future without much hassle.
Decor
Posters, Puzzles & other Trinkets
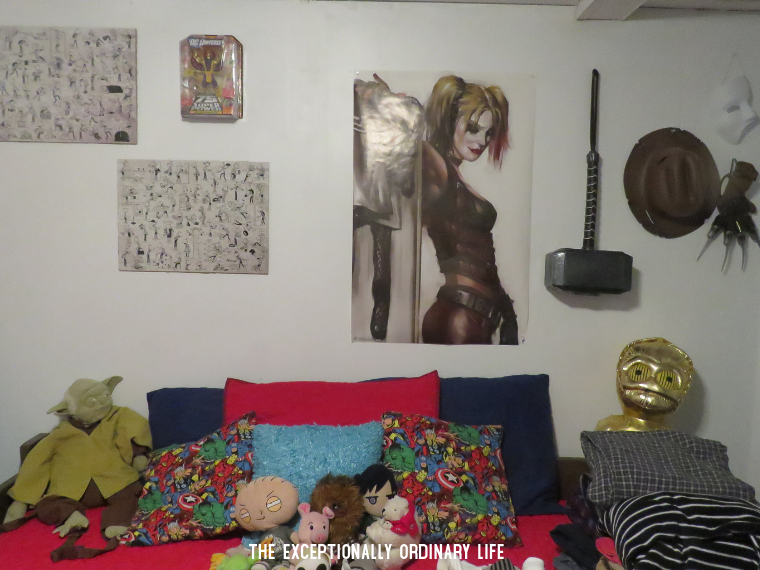
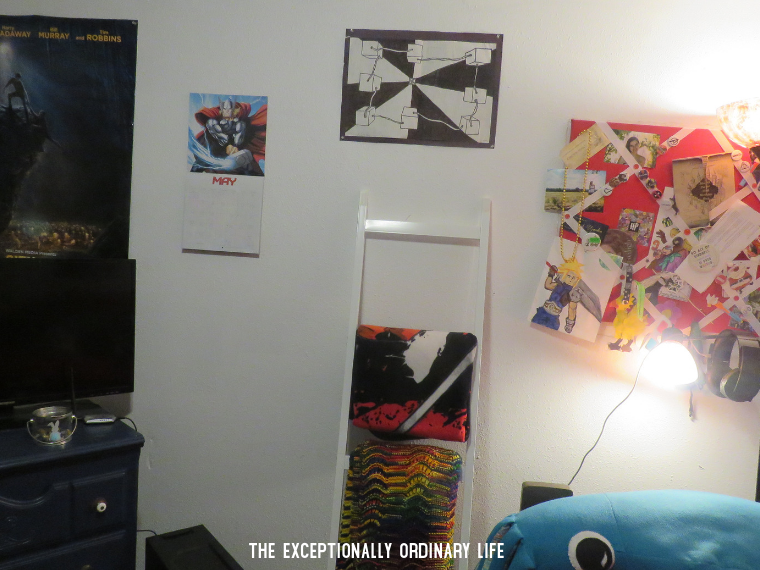
He already had all the posters, puzzles, etc. We initially removed them to avoid damage while painting but put them right back up. We also added a few items that were scattered around and that really helped put the comic book decor together. That’s the stuff he likes (yes, even the plushies ha ha) and we are OK with it.
Just FYI, puzzles are wonderful decorating items. I find most (if not all) of ours at the Goodwill at a fraction of the cost. While they could be a gamble, with the occasional missing piece and all that jazz, at $1-$2 each, they are well worth a try. And even better, if you try to put it together and find some pieces are missing, you can take it back within 7 days of purchasing and Goodwill will give you a store credit.
If that is not something you want to deal with, you can always buy them new, and unopened. Amazon has both Diary or a Wimpy Kid puzzles you see on the picture below and even more options. We have the red boxed 200 piece puzzle, and the green box 200 piece puzzle. Those puzzles come color coded to match the books, btw.
The best part about decorating with puzzles is, you get to have fun while building them! All you need to do is build the puzzle on top of a poster board and when it’s ready, you “glue” it using save-a-puzzle glue. I have read you could also use Mod Podge, but have never tried it myself. Once the puzzle glue or Mod Podge dries, you can simply use double sided tape to display it on your wall. I prefer Gorilla Heavy Duty Mounting Tape above any others for this. It’s easy to use and incredibly strong.
We also used some costume props as seen on the picture below. Basically, the idea is to show off his Freddy Krouger hat and glove, his Phantom of the Opera mask and his Thor hammer, while at the same time keeping them tidy and stored properly, as opposed to just tossing them to the back of his closet.
Pinboard
I made this pin board myself, using red fabric, a hot glue gun (and glue sticks), a white canvas, white ribbon and a few red buttons. It would’ve looked way better if I had added project foam to make it more cushion-y, but I was basically winging it (this was years ago!) and didn’t even think about it until after I had made one for each of my kids! Oh well, live and learn, I guess.
A pin board is an excellent addition to any room. It can be used as a sort of catch-all spot for all those loose pics, mementos, and anything really. I plan on making one for my daughter’s college dorm soon. Hopefully, I’ll remember to add the project foam underneath the fabric this time around.

String Lights
He had mentioned he wanted some string lights in his room but I was having the hardest of times finding any that were not flowers, hearts, or anything commonly labeled as “girly”. I finally found the perfect ones at Target. These string lights are battery operated and on wire strings, which makes them fairly easy to set up wherever you want them. They are also simple and not a bit “girly”.

Area Rug
While putting it all together, I realized that the floor needed “something”. A small area rug was definitely the right choice but it had to be machine washable (Remember Sparky?). The rug would be getting more than its share of cat hairs.
I searched for a nice and affordable rug everywhere! But no matter which stores I visited, the results were the same: the designs were either too feminine, too formal or just plain ugly. Or my least favorite: too expensive. Thankfully, I was able to find this one at Target (Target to the rescue. Again!). It was not only the perfect, matching color for the room, but also machine washable.

Extras
While at Target, I browsed a bit for other items that might add a nice touch to his room. I found this decorative ladder on clearance, at $12.xx, down from $49.xx. Score! These ladders are a great addition to any room and make for a fantastic alternative to just folding your extra blankets and leaving them on your bed or couch.
We rarely use the flat sheets that come with every bed sheet set, and they tend to just remain in a drawer or folded under the pillows. My son had also got a new Deadpool blanket as a birthday present so that one needed a home as well. This beautiful ladder looks amazing and truly serves a purpose.
If you have teenagers (or kids of any age, really), you know how difficult it is to keep cups and water bottles out of their sleeping spaces. We have a very strict no-eating in the bedrooms policy but it is a lot harder to keep them from drinking something, especially with that terrible, right-before-bedtime thirst syndrome.
To try to contain the water rings as much as possible, I have made them all coasters to match their rooms’ decor. I am hoping this will be the secret of my success. A few months ago, I had a general idea of how to make these and decided I’d make some for family and friends. If you need step by step instructions, you can go check The Cottage Mama. She has an amazing tutorial to make these coasters.
The project is quite simple though. You will need the following:
–Ceramic tiles, which you can find at any hardware store (That’s where I got mine.)
–Scrapbook paper of your preferred design.
-Mod Podge (I prefer the gloss finish, but you may use matte finish if you’d like)
–Mod Podge Clear Acrylic Sealer (Again, I prefer the gloss finish but there is matte finish of this product as well.)
–Foam brushes (Get the good ones, with the wooden handle; the cheap ones with plastic handles do not last at all.)
–Cork for the underside.
I realize this little project might sound costly when you add up all the materials but keep in mind that each and every one of the items listed above will be good for plenty more projects, not just this one. In my case, I already had everything I needed at home, since I am always working on little projects so it cost me nothing to get it done.
And look how neat it turned out!
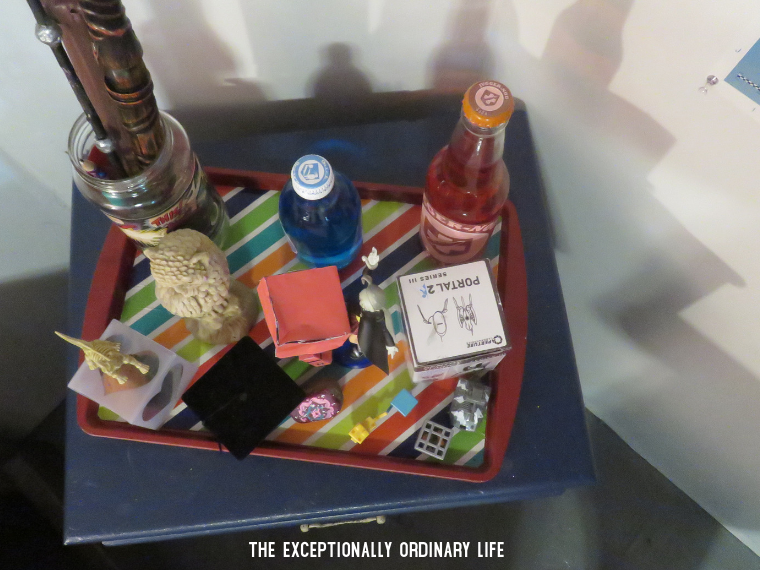
In our home we tend to save some empty glass jars and plastic containers to use for storage or for small projects. Such a glass jar is what I used to make a container for wands (We are Harry Potter nerds), pens, and other items. I used the same foam brushes, Mod Podge, and another piece of the Spiderman scrapbook paper to decorate it a bit. And it looks pretty cool, doesn’t it?

To finish this small but important part of the decorating process, I made him a tray for his night stand. I had made one previously to hold all my perfumes on top of my dresser and not only was it easy to make, but it also turned out pretty good, if I do say so myself.
I got the idea from one of my favorite bloggers, Ruth Soukup of Living Well Spending Less. She made one for her make up a while back and it seemed simple enough to make. This is another instance where the foam brushes, the Mod Podge, and the clear acrylic sealer can be put to work.
This is how my kid’s tray turned out.
Closet
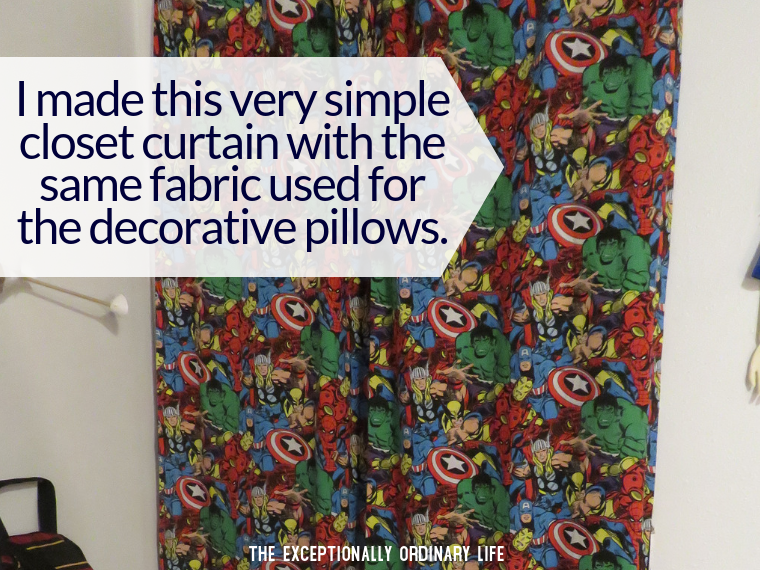
When I made his decorative pillows a while back, I also made a curtain for his closet using the same fabric. As I said before, he loves the geeky/comic book theme for his room and is in no hurry to change it so I won’t bother.
The only thing I changed in his closet was paint the closet floor to match the rest of the room (which did not match before at all) and swapped the plastic drawers he had there for a wood dresser I had in my crafts/stockpile room. While the drawers are a bit smaller on this other dresser, they are a lot sturdier and work well for him.
Furniture
All the furniture in his room is very old. The bed was actually my husband’s when he was a kid. It is part of a bunk bed, with the other bed still at my sister-in-law’s house. It’s old but very sturdy. You know, like good old furniture tends to be.

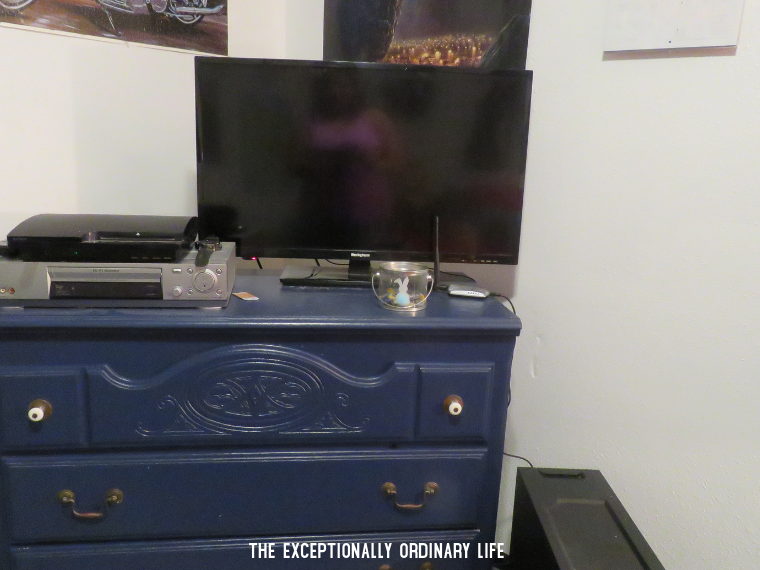
His dresser and night stand I found on a local Facebook group for free a while back. Both were solid pieces also but looked ugly and dingy. We simply painted them both and gave them a new life.

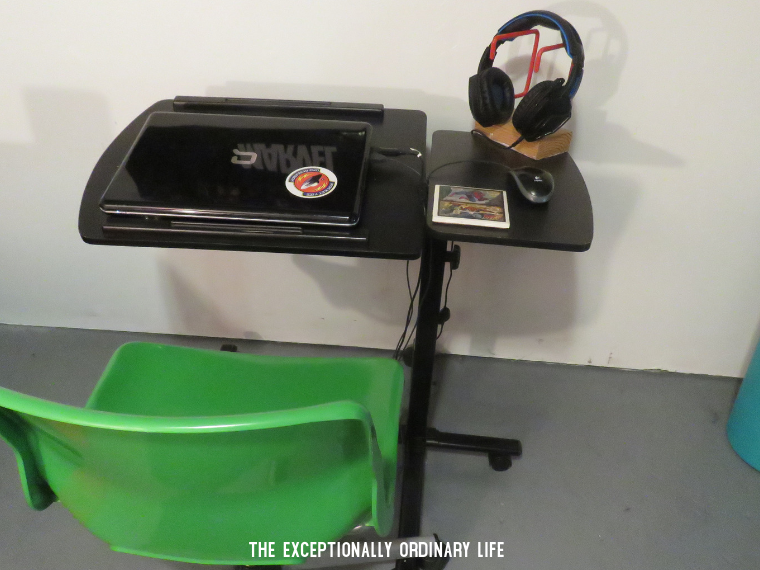
We used to have this laptop desk in our living room but stopped using it because it was just one more thing to clean and move out of the way. And that green chair? Another find of mine on a local B/S/T Facebook group. Sometimes I am amazed by all the stuff people throw out!
Bed
The one thing that was in dire need of replacing in his room was definitely the mattress. His old one came from my Sister in law’s house and if I had to guess, it’s as old as dirt. He needed an update like, 10 years ago!
I was on a tight budget though. What did I do, then? I went to Goodwill, of course. I am not sure if you know, but Goodwill sells new mattresses, still wrapped up in the factory plastic. While the new mattress is no Sleep Number, or NECTAR Sleep Mattress, it is a massive upgrade and he is extremely happy with it.
It was an upgrade, but not a fancy one. The new mattress will, however, be more than sufficient for him, for the next 2 years before he heads out to finish college.
The final product
When all was said and done, I spent a whooping $300.xx on everything. For us, a new mattress, shelving, and floor/ceiling paint were a must, if we really wanted to make this a 100% room makeover. Most of our budget was spent on those much needed items. If all you need is simple decor ideas, bedding, etc. then your total will be much, much lower.
The bottom line is, you do not need thousands of dollars to make your space, any space, look nice and pleasing (unless you want to be featured on Better Homes and Gardens of course ha ha). Some well chosen paint, bedding and wall decor can make a huge difference without hurting your budget.

Budget Friendly Teenage Boy Bedroom Makeover-DIY
What do you think? Please, share your opinion or ideas in the comments! Or feel free to share pictures of your budget friendly decorations 🙂

Like this post? Save for later!


WOW. That gives me some ideas. I have Austin, who is 11, and his room really needs some organization. Thanks for sharing. Have a great day!
Glad you liked it! Good thing about boys is they seem to like their decor for far longer than girls so investing in making it fun for them by integrating their favorites is a no-brainer 🙂
Hi, thank you very much for this info!
Of course 🙂
You’re welcome!
Pingback: How to Build a Strong Landlord/Tenant Relationship